|
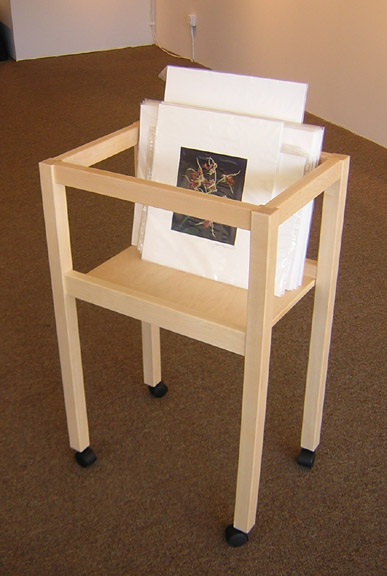
 Occasionally I have the need to show matted prints wrapped in plastic.
The traditional way to do this is in a print bin.
Besides photography,
my other passion in life is fine woodworking, and
I make my own bins to show off of my photographic work.
The exacting detail of my woodworking is reflected in
the same attention to detail in my prints.
Here's how I make the bins.
Occasionally I have the need to show matted prints wrapped in plastic.
The traditional way to do this is in a print bin.
Besides photography,
my other passion in life is fine woodworking, and
I make my own bins to show off of my photographic work.
The exacting detail of my woodworking is reflected in
the same attention to detail in my prints.
Here's how I make the bins.
Click on any image to enlarge it.
- Draw the plans
 Measure twice, cut once...
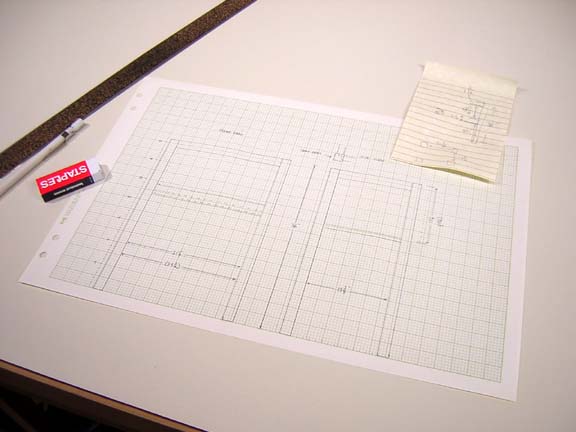
Good plans are an important part of any fine woodworking project.
It is here that all of the design decisions are made,
so that once cutting begins
there will be no wasted wood.
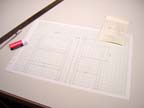
In this case, the print bins are drawn to scale, with a front and side view.
Any special details, such as the leg joints, are also drawn.
Dimensions are noted for future reference.
Before going to the lumber yard,
a rough "layout" is drawn showing how the pieces will
be cut from the boards.
This helps in choosing the right pieces of lumber
to fit the project,
but frequently needs to be re-thought
once I get to the lumber yard and see what they have in stock.
Measure twice, cut once...
Good plans are an important part of any fine woodworking project.
It is here that all of the design decisions are made,
so that once cutting begins
there will be no wasted wood.
In this case, the print bins are drawn to scale, with a front and side view.
Any special details, such as the leg joints, are also drawn.
Dimensions are noted for future reference.
Before going to the lumber yard,
a rough "layout" is drawn showing how the pieces will
be cut from the boards.
This helps in choosing the right pieces of lumber
to fit the project,
but frequently needs to be re-thought
once I get to the lumber yard and see what they have in stock.
- Go to the lumber yard and buy some wood
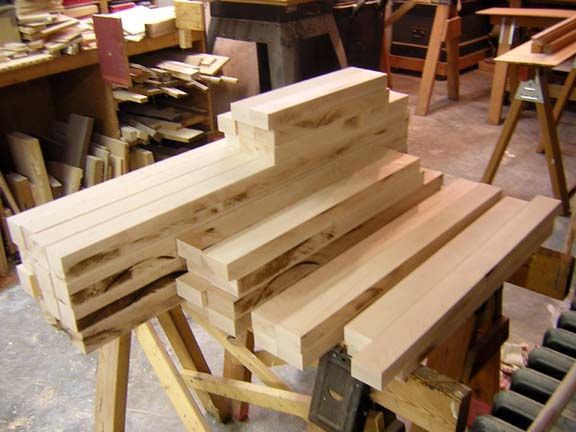
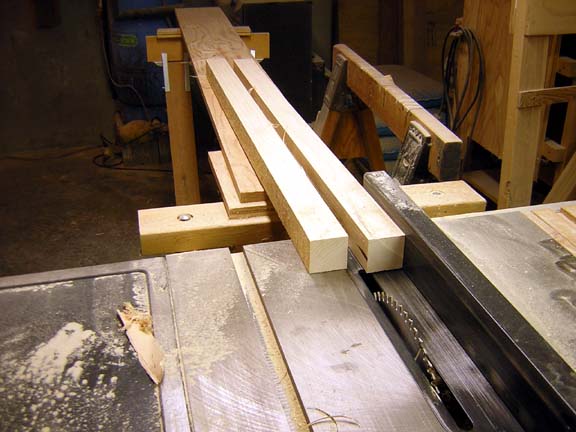
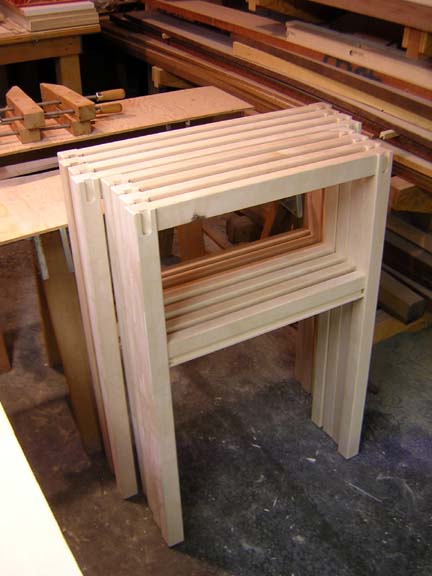
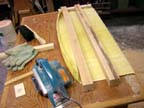
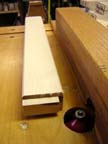
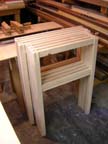
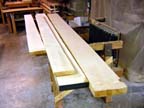 I start with only the finest hardwoods.
My favorite is maple, I guess because I live on Maple Avenue.
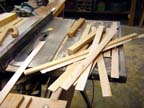
Pictured here is the "raw material" for 4 print bins
which will be going to the
Panopticon Gallery
in Waltham and Boston, MA.
The thickness of hardwood lumber is sized by the quarter inch (before planing).
For this project, I have purchased 8/4 (pronounced "eight quarter") for the legs,
and 6/4 for the parts that connect the legs.
After planing, these are approximately 1.75 and 1.25 inches thick,
but this can vary from board to board,
and it makes the cutting of joints challenging.
I start with only the finest hardwoods.
My favorite is maple, I guess because I live on Maple Avenue.
Pictured here is the "raw material" for 4 print bins
which will be going to the
Panopticon Gallery
in Waltham and Boston, MA.
The thickness of hardwood lumber is sized by the quarter inch (before planing).
For this project, I have purchased 8/4 (pronounced "eight quarter") for the legs,
and 6/4 for the parts that connect the legs.
After planing, these are approximately 1.75 and 1.25 inches thick,
but this can vary from board to board,
and it makes the cutting of joints challenging.
- Cutting the boards to approximate length
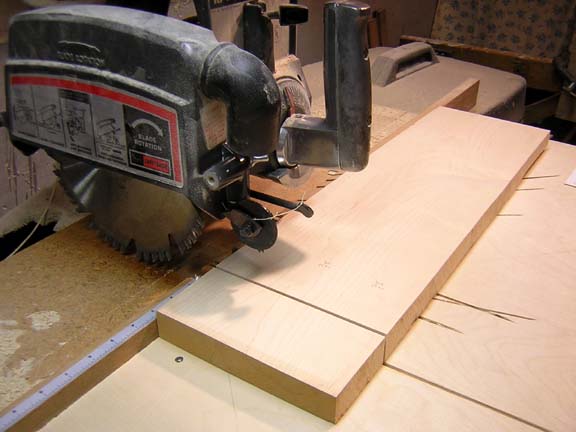
 Using the radial arm saw, the wood is first cut to approximate lengths for each of the parts of the bins.
Typically I cut about 1 inch longer than needed at this point.
The reason is that there is not yet a well-defined "long"
edge (wood from the lumber mill can be quite "curvy"),
and the final end cuts must be exactly 90 degrees to the long edges.
Therefore, the exact lengths will be cut later, once the pieces are cut to proper width.
It can be quite a puzzle to figure out how best to use each board,
and each piece is laid out in pencil before any cuts are made.
The last 4 inches or so of each board cannot be used because of possible splitting
caused by non-uniform drying.
Using the radial arm saw, the wood is first cut to approximate lengths for each of the parts of the bins.
Typically I cut about 1 inch longer than needed at this point.
The reason is that there is not yet a well-defined "long"
edge (wood from the lumber mill can be quite "curvy"),
and the final end cuts must be exactly 90 degrees to the long edges.
Therefore, the exact lengths will be cut later, once the pieces are cut to proper width.
It can be quite a puzzle to figure out how best to use each board,
and each piece is laid out in pencil before any cuts are made.
The last 4 inches or so of each board cannot be used because of possible splitting
caused by non-uniform drying.
- Cutting the boards to exact width
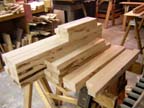
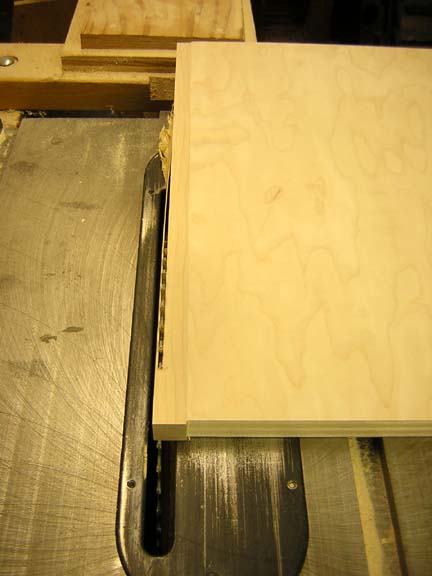
 Next, the boards are cut to exact width.
This operation is typically referred to as "ripping,"
and is done using the table saw.
The first photo shows two legs being ripped from a piece of 8/4 maple.
The second photo shows all of the pieces after ripping.
Note the saw marks on the edges, which will be removed in step 6.
At this point, careful note is made of the order of the pieces.
Whenever possible, pieces that came from adjacent parts of the tree
will end up on opposite sides of a bin.
This is especially important with the legs --
my notations can be seen in the finished bins on the bottom of each leg.
The legs are oriented such that the quarter-sawn surface faces front and back.
This is the side of the piece that was perpendicular to the radius of the tree,
and is the better looking surface, in my opinion.
Next, the boards are cut to exact width.
This operation is typically referred to as "ripping,"
and is done using the table saw.
The first photo shows two legs being ripped from a piece of 8/4 maple.
The second photo shows all of the pieces after ripping.
Note the saw marks on the edges, which will be removed in step 6.
At this point, careful note is made of the order of the pieces.
Whenever possible, pieces that came from adjacent parts of the tree
will end up on opposite sides of a bin.
This is especially important with the legs --
my notations can be seen in the finished bins on the bottom of each leg.
The legs are oriented such that the quarter-sawn surface faces front and back.
This is the side of the piece that was perpendicular to the radius of the tree,
and is the better looking surface, in my opinion.
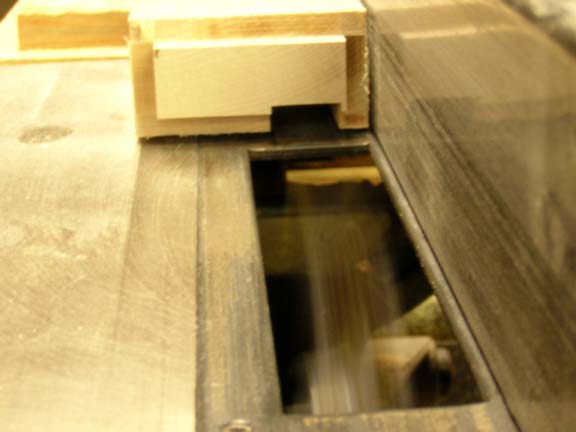
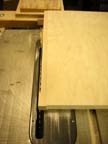
- Cutting the boards to exact length
 The boards are now cut to exact length,
again using the radial arm saw (which has been carefully checked for square).
First the left end is trimmed,
then the piece is slid over and placed against the block of wood
clamped onto the saw base (visible on the left of the photo),
and the right end is trimmed.
This insures that all pieces of each type are exactly the same length.
The boards are now cut to exact length,
again using the radial arm saw (which has been carefully checked for square).
First the left end is trimmed,
then the piece is slid over and placed against the block of wood
clamped onto the saw base (visible on the left of the photo),
and the right end is trimmed.
This insures that all pieces of each type are exactly the same length.
- Planing
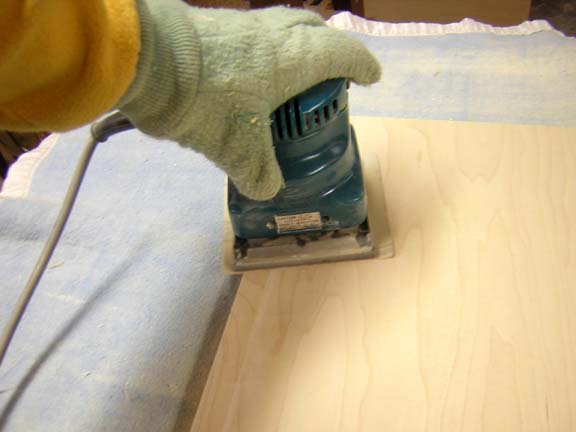
Each piece is then planed with the power planer
(the blue thing in the photo)
to remove saw marks, pencil marks,
and dirt that always seems to accompany
hardwood home from the lumber yard.
The wood on the right has not yet been planed, while the
wood on the left has.
These 2 pieces are legs.
From this point on, the wood is handled with cotton gloves,
and is always placed on a soft surface to
avoid oils from my hands and indentations from wood chips.
- Cutting the mortises

Except for the wheels,
there are no metal fittings used in the construction of the print bins.
The joints used to join the pieces
are called "mortise and tenon" joints,
and are exceptionally strong if cut correctly.
In the step pictured here, the mortise (or indentation)
is first cut in the legs using the router table.
This is a shop-built device with a router mounted
upside down, with
the router bit protruding a precise distance above the table surface.
A fence guides the piece being cut, and
is placed a precise distance from the router bit.
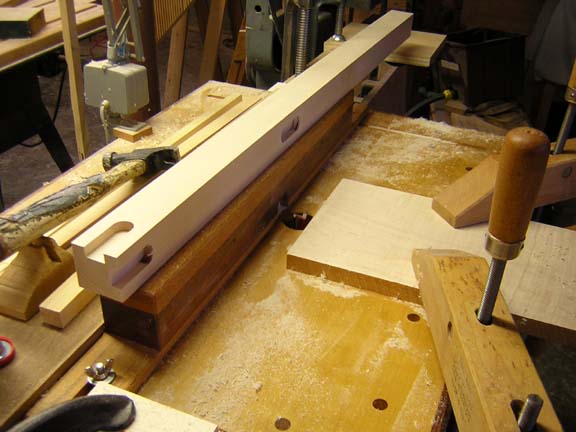
The first photo shows a mortise that has just been cut in the top
of a leg.
Notice the stop block that is clamped to the fence on the left of the photo
to control the length of the joint.
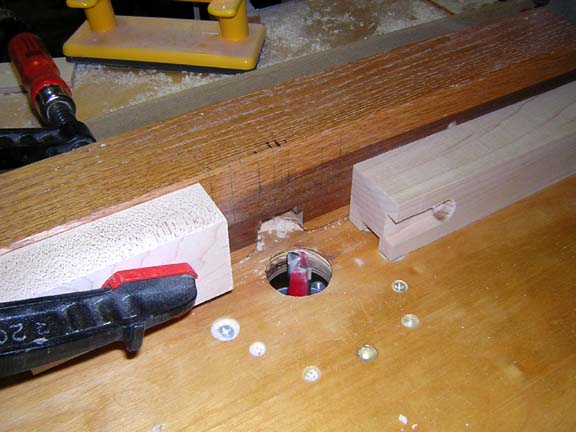
The second picture shows a mortise that has just been cut in the middle of the leg
(to support the bottom cross piece and the shelf).
In this case, stop blocks have been positioned at either end of the leg to control
the length of the mortise, and a board has been clamped in front to prevent the piece from running away
(moving uncontrollably in the wrong direction),
which can happen with the back-and-forth cutting motion needed
for this step.
Because of the desire to have the front surfaces of the legs be the
quarter-sawn surface,
the joints are marked in pencil on each set of legs before any of the joints are cut.
- Cutting the tenons
Next, the tenons are cut in the ends of all the cross pieces, again using the router table.
The fence is positioned to control the length of the tenon,
and the height of the router bit is adjusted to control its width.
This is the most exacting part of the project,
and must be done with care, preferably after a good night's sleep.
This can also be a frustrating activity,
because the thickness of the joint depends upon the thickness
of the piece of wood.
Remember what I said above: each board can be a slightly different
thickness,
and furthermore the planing I do (see step 6 above)
changes the thickness of each piece as well.
Although I am extremely careful to maintain equal thicknesses of
all pieces of a certain type, there is
always some variability.
The width of the tenon needs to match the width of the mortise to within 1/100 inch.
Since the width of the mortise is determined by the diameter of the router bit
in the previous step, each tenon must be cut to fit like a glove in the
already cut mortises.
This is done by placing several 5x8 cards under the piece as the initial pass of the tenon is cut
(see the first photo).
A single 5x8 card is 1/100 inch thick.
The tenon is tested using a mortise cut in a piece of scrap (see the second photo).
The 5x8 cards are removed one at a time, and the tenon is re-cut until
there is a sliding fit with no extra "wiggle."
- Preparing the shelf


The "shelf" of the print bin (the part the prints rest on)
is made from hardwood veneer plywood.
Two of the edges will be hidden in grooves, or "dados"
cut in the front and back cross pieces,
but the sides need to have pieces of solid wood
attached to mask the edge of the plywood.
First, the maple plywood is cut slightly oversize.
Strips of maple are also cut, and are planed to the same thickness
as the plywood.
Glue is applied to both surfaces (first photo),
and they are clamped (second photo)
until the glue is set.
Excess glue is carefully removed before it dries,
since it is hard as a rock once it does.
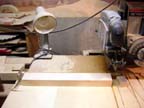
- Cutting the dado

Dado joints are cut in the front and back cross pieces
to support the shelf.
A dado joint is basically a groove
into which a flat piece of wood will be fitted.
To cut this joint, a special blade, called a "dado blade,"
is placed in the table saw.
The blade has an adjustment
that determines the width of the joint,
and this is set to provide
a sliding fit for the plywood.
It is important to not cut joints too tightly, since there
needs to be some space for the glue.
The fence is positioned to determine the location of the joint,
and the piece is run through the saw (see the photo).
The dado blade cuts the groove in one pass.
- Beveling all the corners
I think a nicely beveled edge
adds to the "finished" look of a piece of furniture.
However, cutting bevels on the edges is nearly impossible
once a project is glued together.
Therefore, bevels are now cut on all of the exposed edges.
To do this, a 45 degree
bevel cutting bit is placed in the router table,
and the height of the bit is adjusted to make a pleasing sized bevel.
This bit has a ball bearing guide on it,
and the pieces are placed against the guide as they
run passed the bit,
resulting in a uniform bevel over the length of the piece.
It's important to pay attention to which edges will be exposed,
because I don't want to bevel any edges that will be part of a joint.
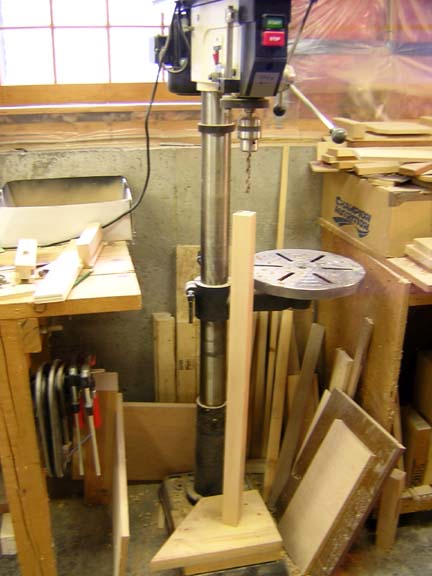
- Drilling holes for the wheels

Another awkward maneuver is drilling holes for the casters after the project is complete.
It's hard to get the holes perpendicular to the plane of the floor,
and it's cumbersome to position a large print bin under the drill press.
Therefore, the holes are drilled at this stage while the legs
are still separate pieces of wood.
This picture shows a leg about to be drilled by
the drill press.
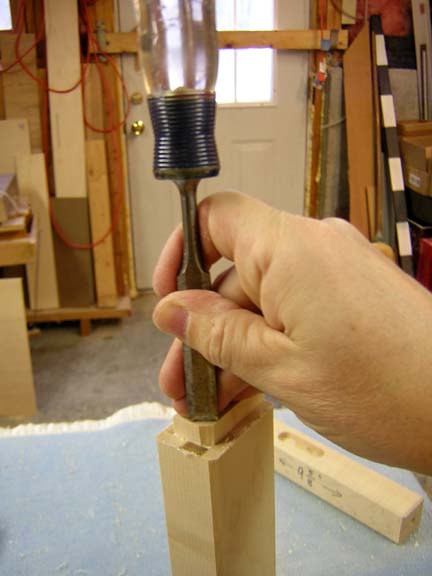
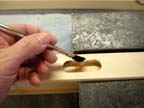
- Rounding the tenons

As cut on the router table, the tenons have square ends, but the mortises are round on the end.
In order for the joints to fit together,
each tenon must be cut with a chisel
so that it has a round end.
I hate this job.
- Sanding everything
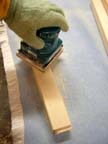
Another nearly impossible task is sanding
a project after it is glued together.
It's very difficult to sand it evenly,
and it's especially hard to sand right up to a joint.
Therefore, all pieces are sanded before
they are glued together.
As the photo shows, I use a
tool called a "palm sander,"
which vibrates at a high speed and is specifically designed to produce
a fine, finished sanding job.
Care needs to be taken when sanding near the mortise joints
on the legs,
since excess sanding will change the dimension of the joint.
- Gluing the fronts and backs
Working with wet glue can be troublesome,
because any mistake at this stage would ruin the entire bin!
Glue needs to be applied evenly and in the correct amount to all surfaces of the joints,
and the joints need to be carefully aligned and clamped.
I must avoid getting glue anywhere else other than in the joints,
since this would spoil the finish.
 All the while, the glue is drying,
and there is only a short interval of time to get all this done correctly.
Therefore, any time a project can be glued up in stages, it
increases the likelihood of success.
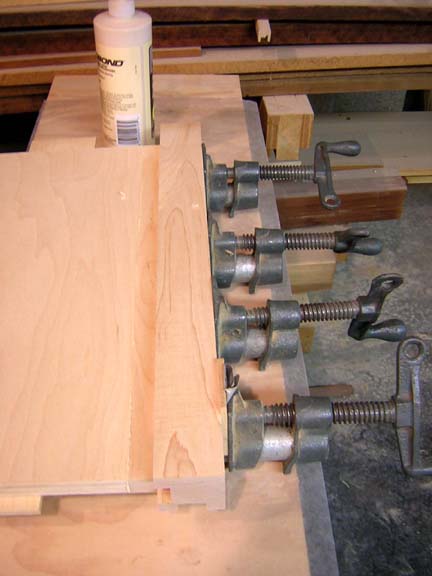
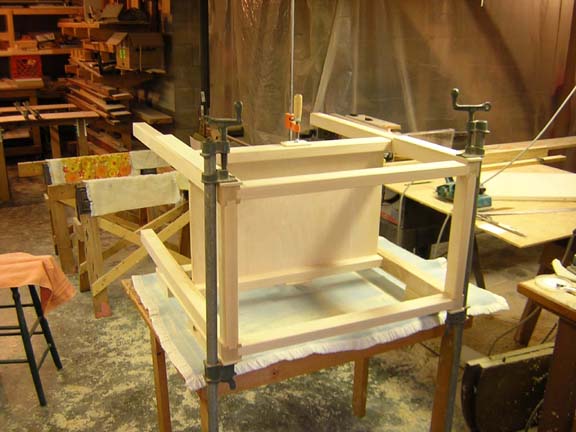
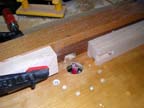
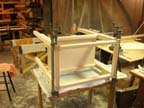
For this project, I glue all of the fronts and backs first.
Glue is applied with a disposable brush (first photo),
and the front (or back) is clamped
until dry.
The block of wood in the center of the table is used as a gauge to position the
lower cross piece at precisely the right distance from the top.
Other blocks of wood, not really visible in the photo,
are used to prevent the clamps from marking the legs.
All the while, the glue is drying,
and there is only a short interval of time to get all this done correctly.
Therefore, any time a project can be glued up in stages, it
increases the likelihood of success.
For this project, I glue all of the fronts and backs first.
Glue is applied with a disposable brush (first photo),
and the front (or back) is clamped
until dry.
The block of wood in the center of the table is used as a gauge to position the
lower cross piece at precisely the right distance from the top.
Other blocks of wood, not really visible in the photo,
are used to prevent the clamps from marking the legs.
- Finishing the shelves

Now the shelves are sanded so that the strips of maple along the exposed edges
exactly "blend" with the plywood.
Then the shelves are cut to exact width and length
using the table saw.
The exposed edges are beveled (not shown),
and a final pass is made with the palm sander.
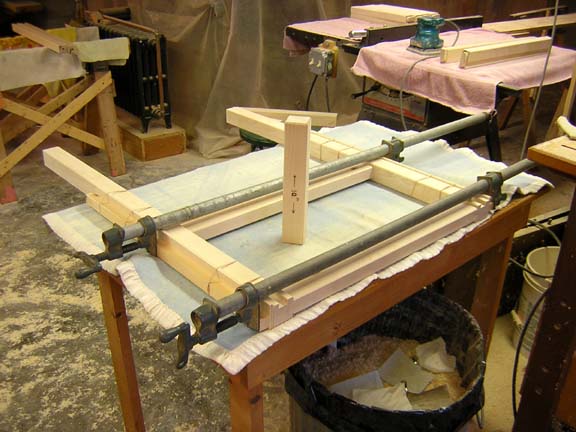
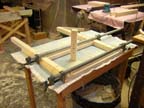
- Final gluing
Glue is now applied to a front, a back, and the pieces that will join them.
This is a tricky process, and a "dress rehearsal" (without glue)
is conducted on each bin
to make sure that all the pieces fit correctly, and I
can perform the steps smoothly.
The bin is then clamped (as shown)
and allowed to dry.
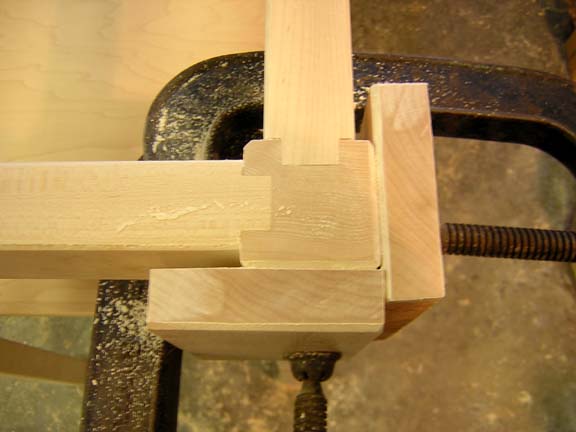
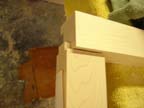
- Sand the tops

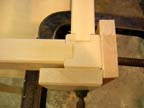
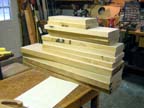
The final step is to sand the very top of the bins -- especially the legs --
so the joints look pretty.
Blocks of wood are clamped to the sides of the legs to prevent
them from being rounded over by the palm sander.
This sanding can take quite a while, but the effect is wonderful.
The first photo shows the top of a leg before sanding,
and the second shows it after sanding.
- Varnish
Sorry, no photo for this step -- it's kinda boring!
I use a wipe-on polyurethane varnish that is applied with a rag.
The varnish is allowed to dry overnight,
then it is very lightly sanded with
400 grit sandpaper
just enough to smooth the surface
but not enough to sand through the very thin coat of varnish.
A second coat is then applied, and we're done -- except for one last step...
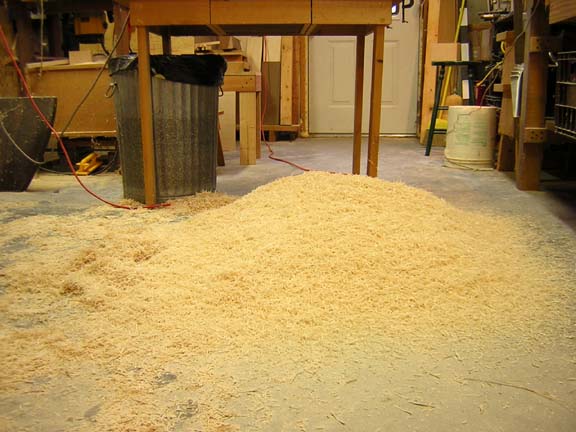
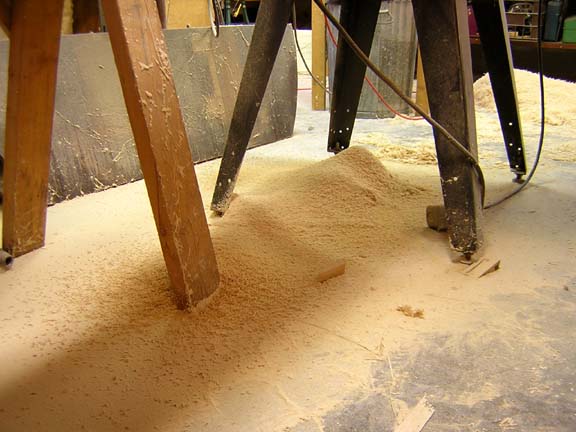
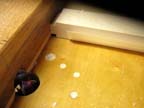
- Clean the shop
Actually, the shop is cleaned after each step of the project, but I thought a few photos
of the "leftovers"
would be an amusing way to end the story!


|
|